Syncing files between OpenMediaVault and Microsoft Azure Blob Storage with Rclone
Background
Recently I decided to decommission my HP ProLiant MicroServer N40L in favour for a Raspberry Pi 4 (4GB) . The HP MicroServer previously hosted a couple of websites that required IIS (Internet Information Services) and also a internal file server. There were a few bit and bobs of software running to sync files but nothing too fancy.
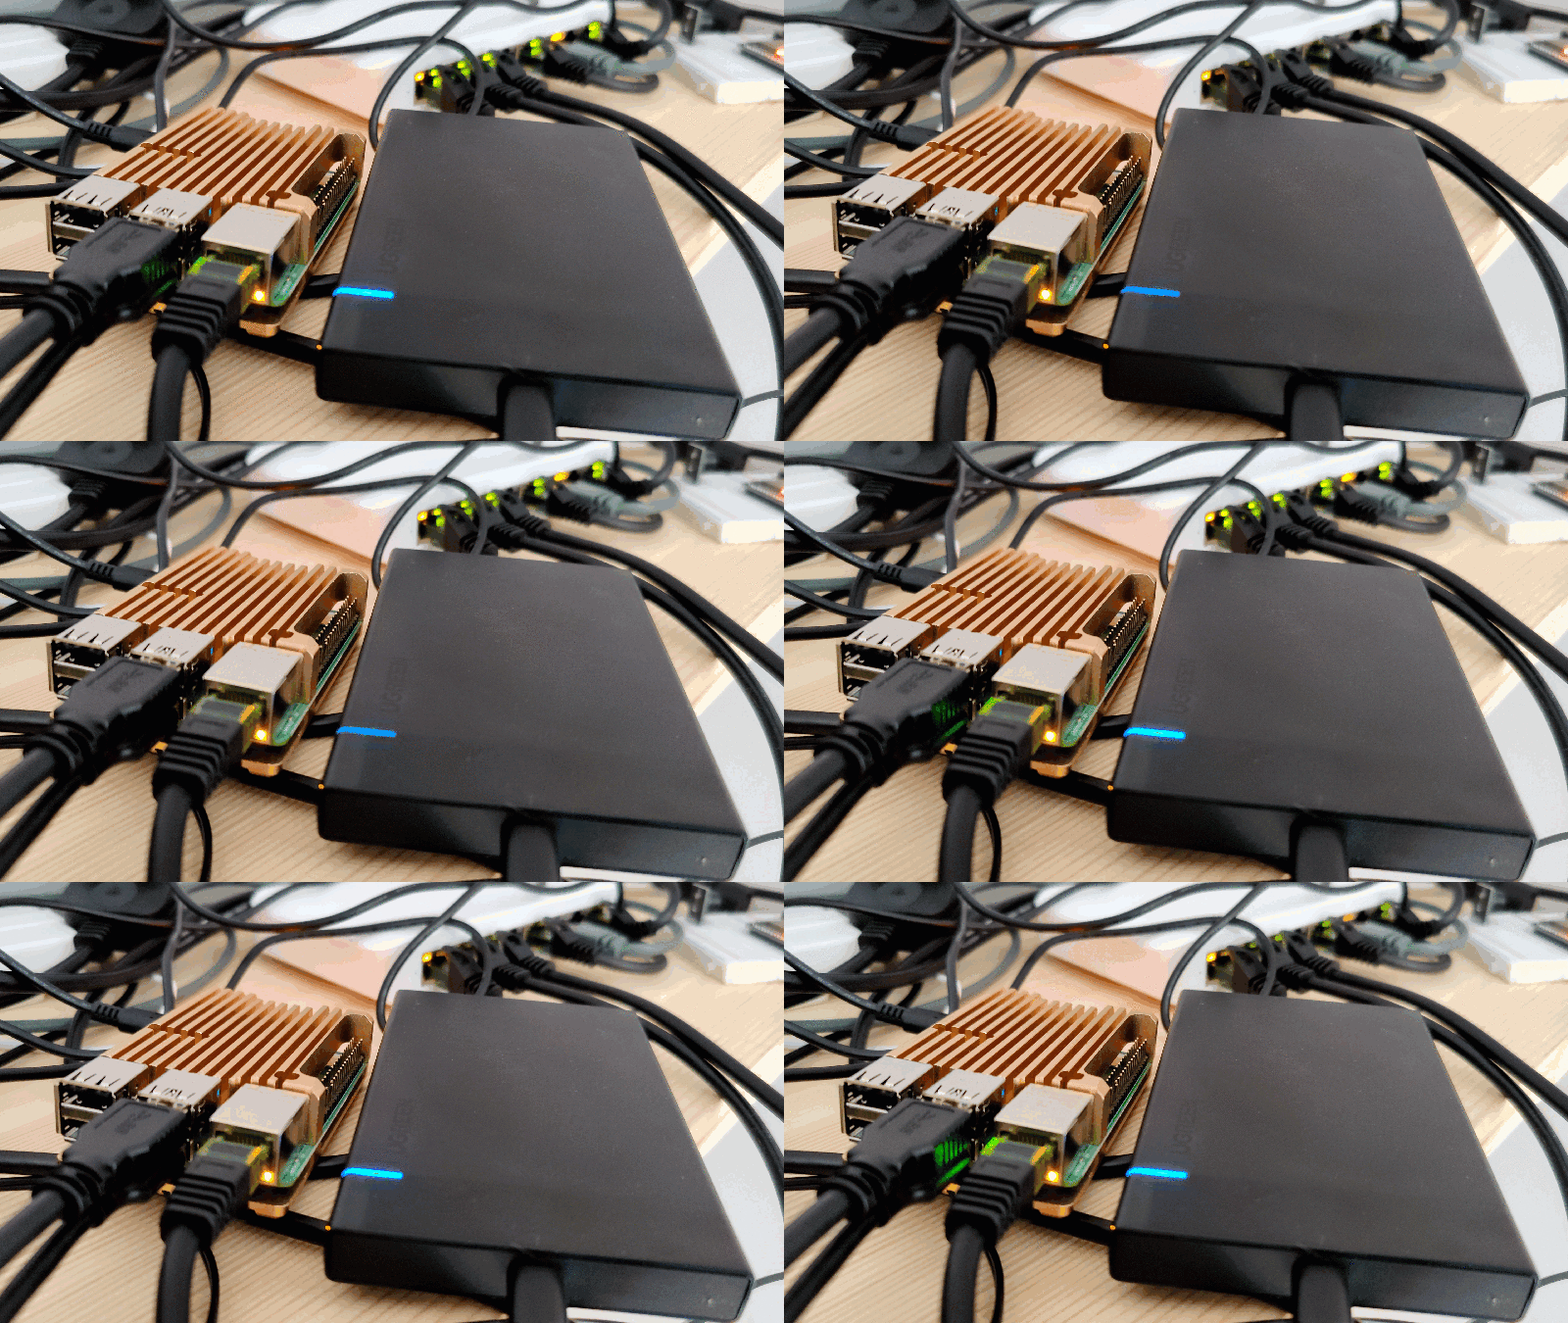
Now I’ve moved over to a single Raspberry Pi 4 (4GB) running OpenMediaVault with Docker and Portainer installed for manage my running docker containers. The reasons being, I don’t need Windows anymore, the power consumption is less and it doesn’t sound like I’m sat in a aircraft hanger when the machine is running.
The Raspberry Pi currently has 1x 256GB SSD for the OS and 2x 3TB WD Red Plus 3TB HDD for storage. The storage is all connected via the USB3.0 ports in external USB Enclosures.

The only downside I see to this setup is the bandwidth for the USB ports as the HP MicroServer has dedicated ports and even PCI-E expansion slots, however, I’m not shoveling a lot of data around with multiple users.
OpenMediaVault
I have OpenMediaVault setup on the Raspberry Pi to turn it in to a network-attached storage device. Within my local network I share files via SMB for the devices locally, however, I’ve not got anything setup locally to deal with fault tolerance (such as RAID etc..). The data that resides on my OpenMediaVault doesn’t change often and isn’t of high value, so I opted to just periodically sync the data with a cloud provider (Azure).
Syncing to Azure Blob Storage
Setup Azure Blob Storage
To begin with we will need to setup a Azure Blob Storage in your Azure subscription. I’ll be doing this using the Azure CLI, however, it’s all possible in the Azure Portal too.
If you’re not already logged in via the CLI you’ll need to run the login command
az login
If you are on a headless machine, you can use the –use-device-code argument which will give you a URL to visit on another device (which can be your phone!) and a code to enter.
az login –use-device-code
Once logged in we will need to create a resource group to create our storage account within.
az group create --location WestEurope --name rg-my-backup
Then we’ll need to create a storage account, the name of the storage account has to be globally unique across all storage accounts. So to start with we’ll choose a unique name and check it’s available.
az storage account check-name --name stmybackupf722170c
Note that there is restrictions of the characters that can be used for storage account names, there’s also a recommended naming convention for azure resources which is worth checking out.
Once you’ve found a name that is available we can go ahead and create the storage account with the create command.
az storage account create –-name stmybackupf722170c -–resource-group rg-my-backup -–location WestEurope –-sku Standard_LRS
This will create us our storage account named stmybackupf722170c in the resource group rg-my-backup that has a SKU which provides Locally Redundant Storage. There is a range of SKU types to pick from so it’s worth picking one that suits your requirements.
To authenticate our requests later on with Rclone, let’s just grab the access keys for our storage account.
az storage account keys list --account-name stmybackupf722170c --resource-group rg-my-backup
This will then output 2 keys which can be used to rotate the keys if required.
[
    {
        "keyName": "key1",
        "permissions": "Full",
        "value": "The Actual Key 1 Value"
    },
    {
        "keyName": "key1",
        "permissions": "Full",
        "value": "The Actual Key 2 Value"
    }
]
There’s also other securer ways to authenticate, such as SAS Tokens(Shared Access Signature) and azure identities. However, for this small project it’s fairly isolated.
Everything in Azure is ready to go, now we just need to setup the syncing process.
Installing Rclone
Rclone is a great tool for syncing to cloud environments, it has a wide range of Storage Systems which can be straight out the box.
Rclone provides an script to allow an easy install process.
We need to SSH to our OpenMediaVault (If you’ve not not SSH enabled, checkout the Docs/Services/SSH) then run the following command.
curl https://rclone.org/install.sh | sudo bash
This will take a few seconds to install but once finished we can configure Rclone.
Configure Azure Blob in Rclone
Next we’ll need to run rclone config.
rclone config

n) New remote
s) Set configuration password
q) Quit config
n/s/q>
For this we need to configure a New remote which is option n.
Once selected we’ll be presented with a list of remote types, the one which we want is azureblob.
Next we’ll have to enter a few settings, the storage account name, account name, and the access key.
Once completed we’ll have a configuration like the following (based on what we’ve setup earlier).
[azure_stmybackupf722170c]
type = azureblob
account = stmybackupf722170c
key = The Actual Key 1 Value
Create a container
One last thing we need to do is create a container to store the files in the Azure Storage. Rclone can do this for us and it will prove everything is setup correctly too.
rclone mkdir azure_stmybackupf722170c:files
The above will create a files container inside the azure_stmybackupf722170c account.
We can check the containers with the lsd command.
rclone lsd azure_stmybackupf722170c:

    - 2021-08-01 18:50:00       -1 files
Setup Sync Job Inside OpenMediaVault
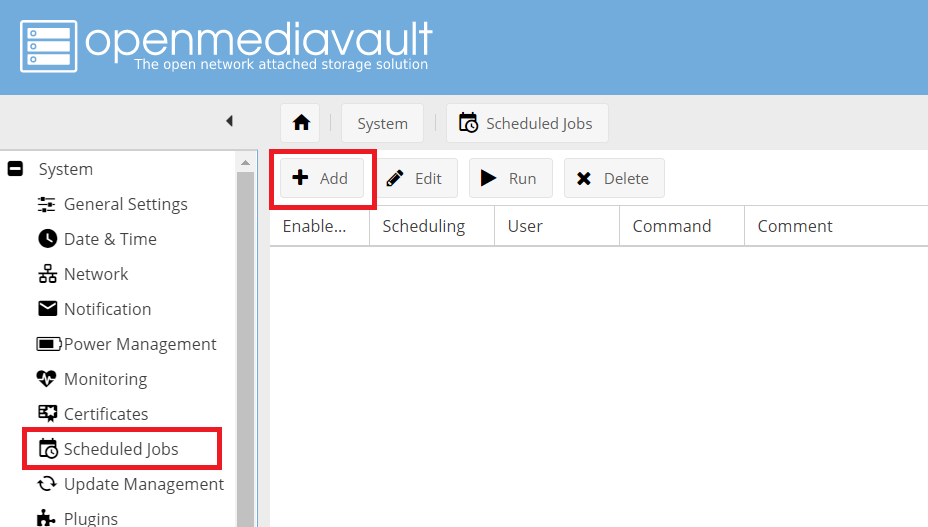
Now if we pop over to the OpenMediaVault portal in your browser of choice, we can navigate to Scheduled Jobs section and create a new job to run.

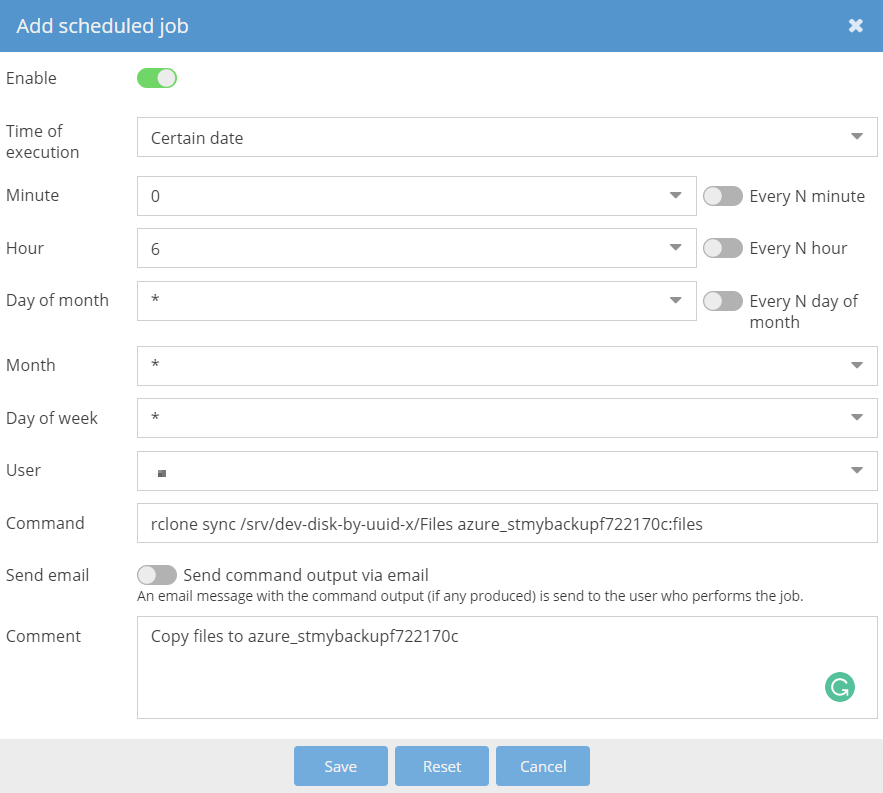
If we select Certain date this will allow set a cron expression, I’ll be using 0 6 * * * which is 6am every day.
We’ll need to set a user which you want the job to run as, this normally doesn’t matter unless you’ve got some restrictive permissions on your files.
The command that we want the job to run is a rclone sync command
rclone sync /srv/dev-disk-by-uuid-x/files azure_stmybackupf722170c:files

This will sync everything from the local /srv/dev-disk-by-uuid-x/files directory to the remote azure_stmybackupf722170c account inside the files container.
Once saved we can click run and then check our Azure Storage Account.